
This knowledge article walks through setting up Workshop with Google SSO
Create Workshop SSO
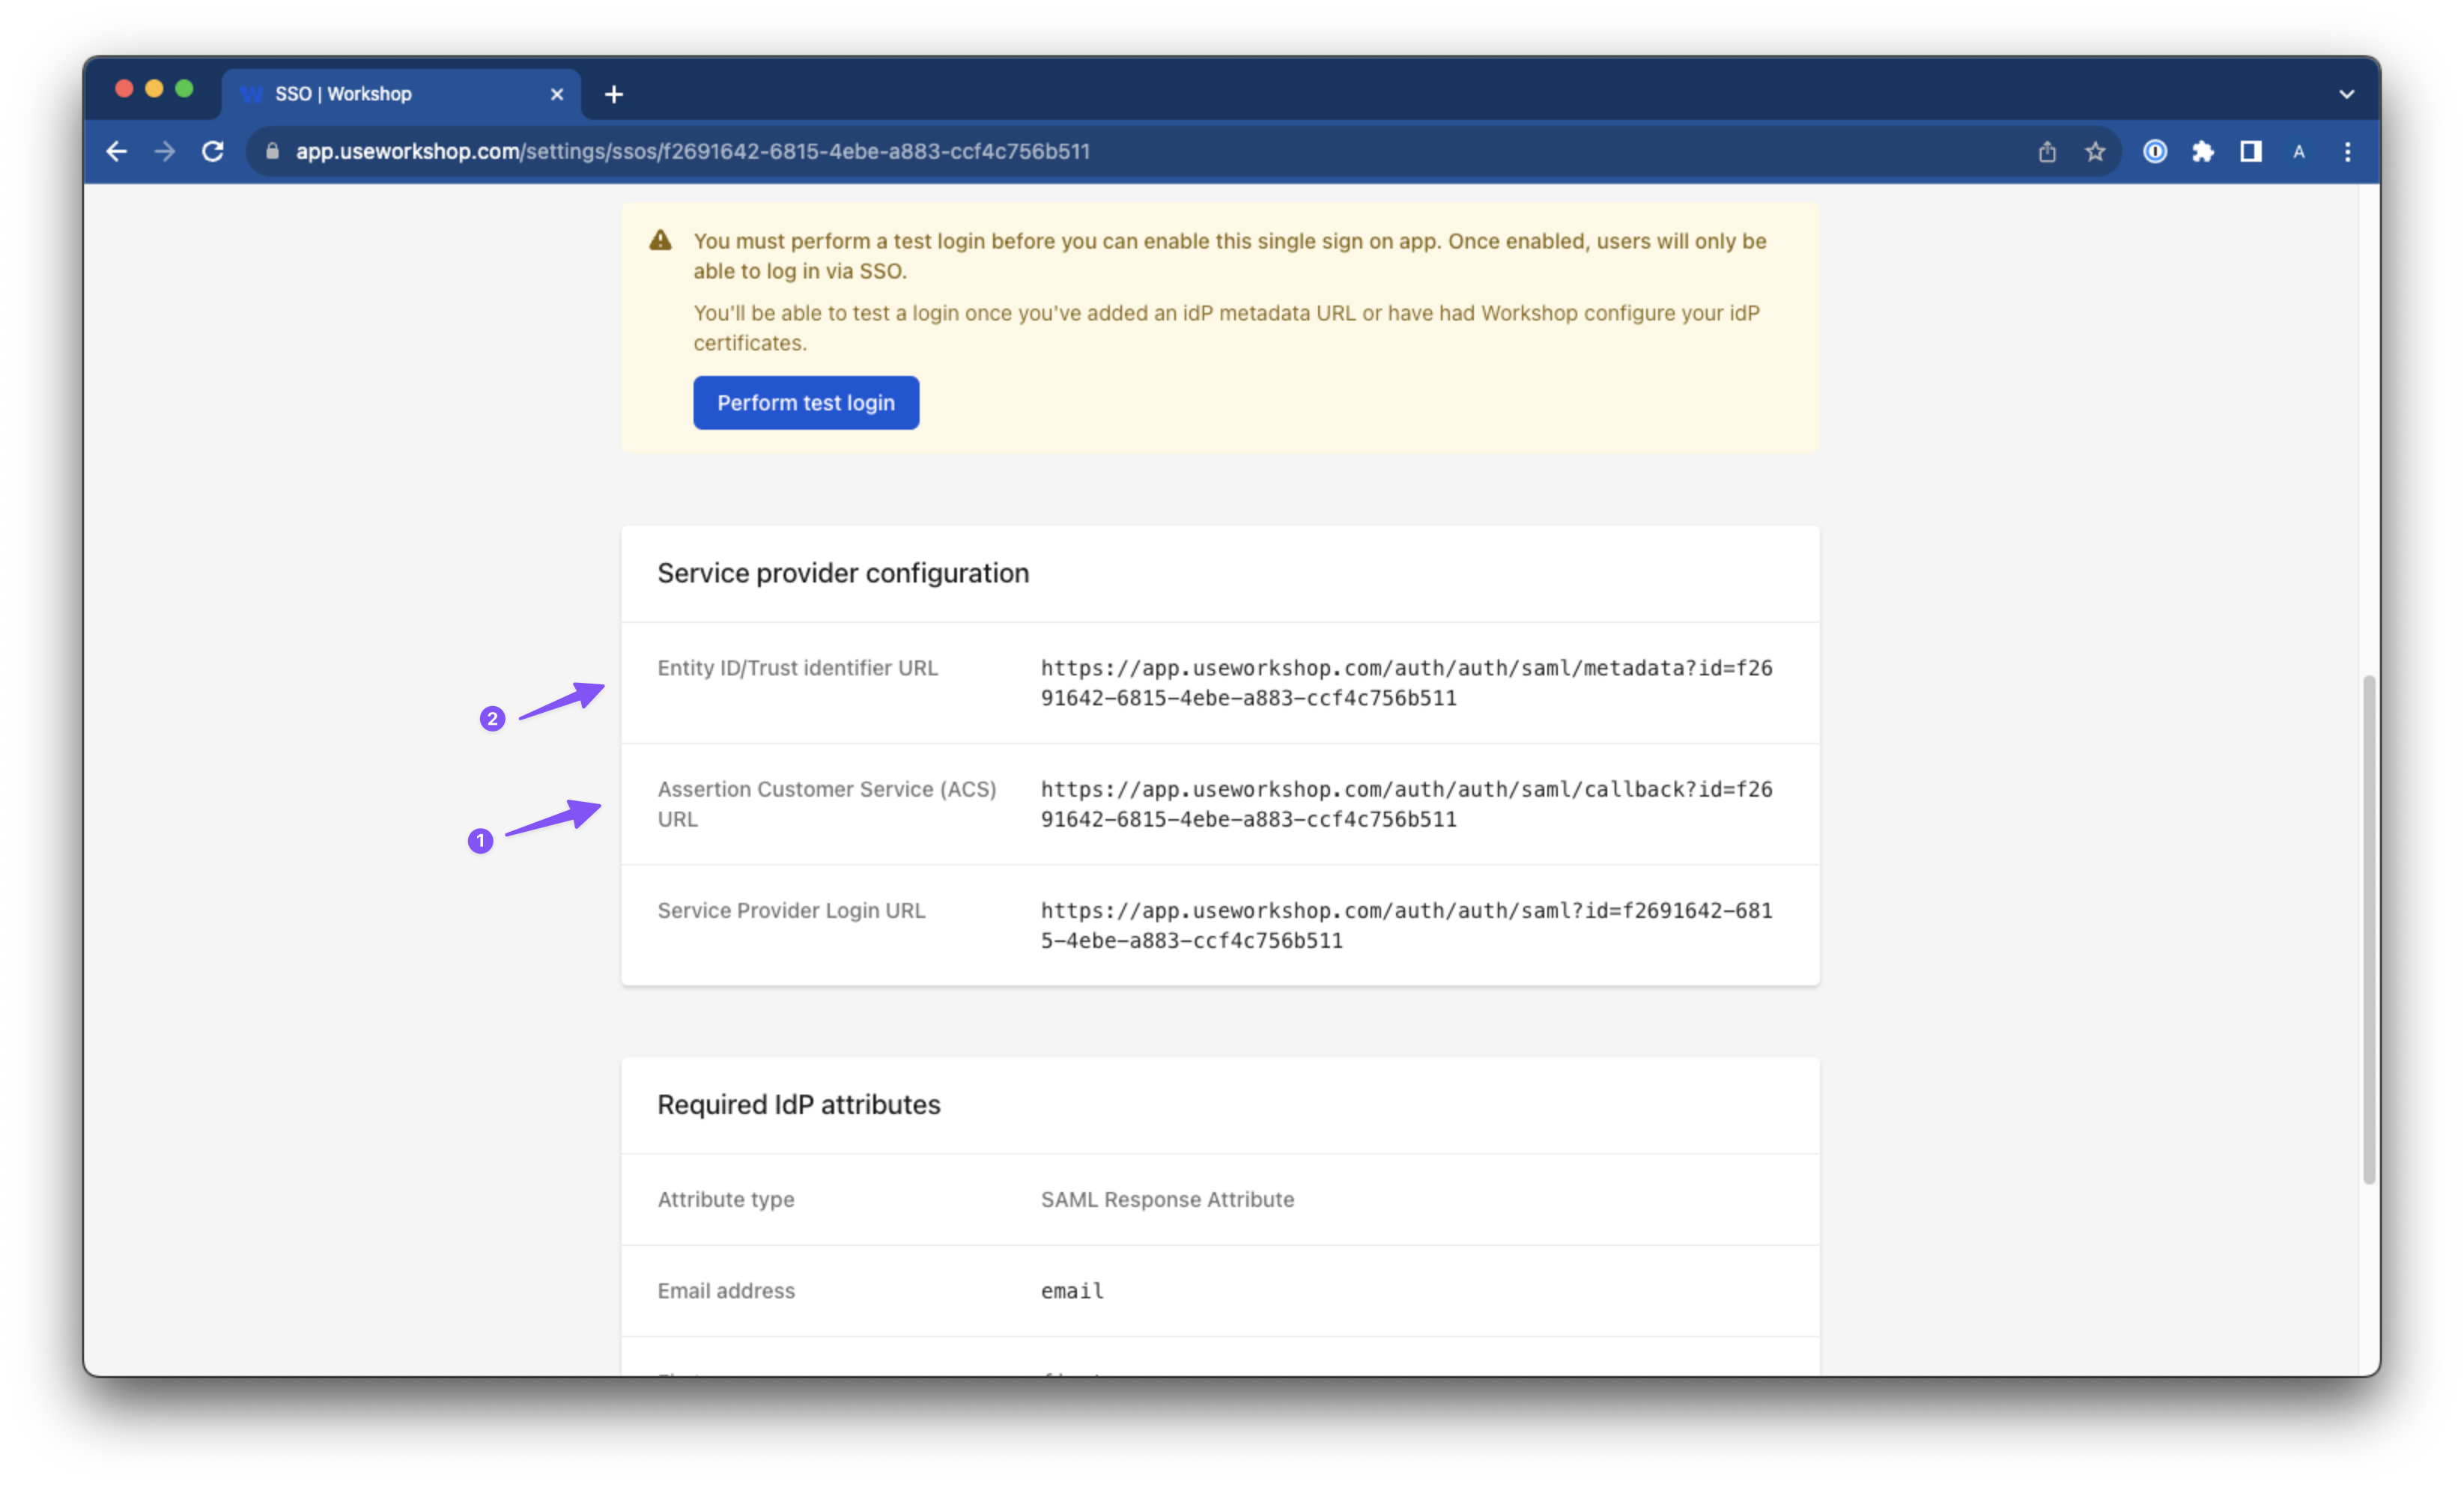
Creating the SSO app within Workshop will generate URLs and important information for use during setup within Google
1. Navigate to the SSO page within Workshop (Settings > SSO)
2. Select the "Add SAML" option
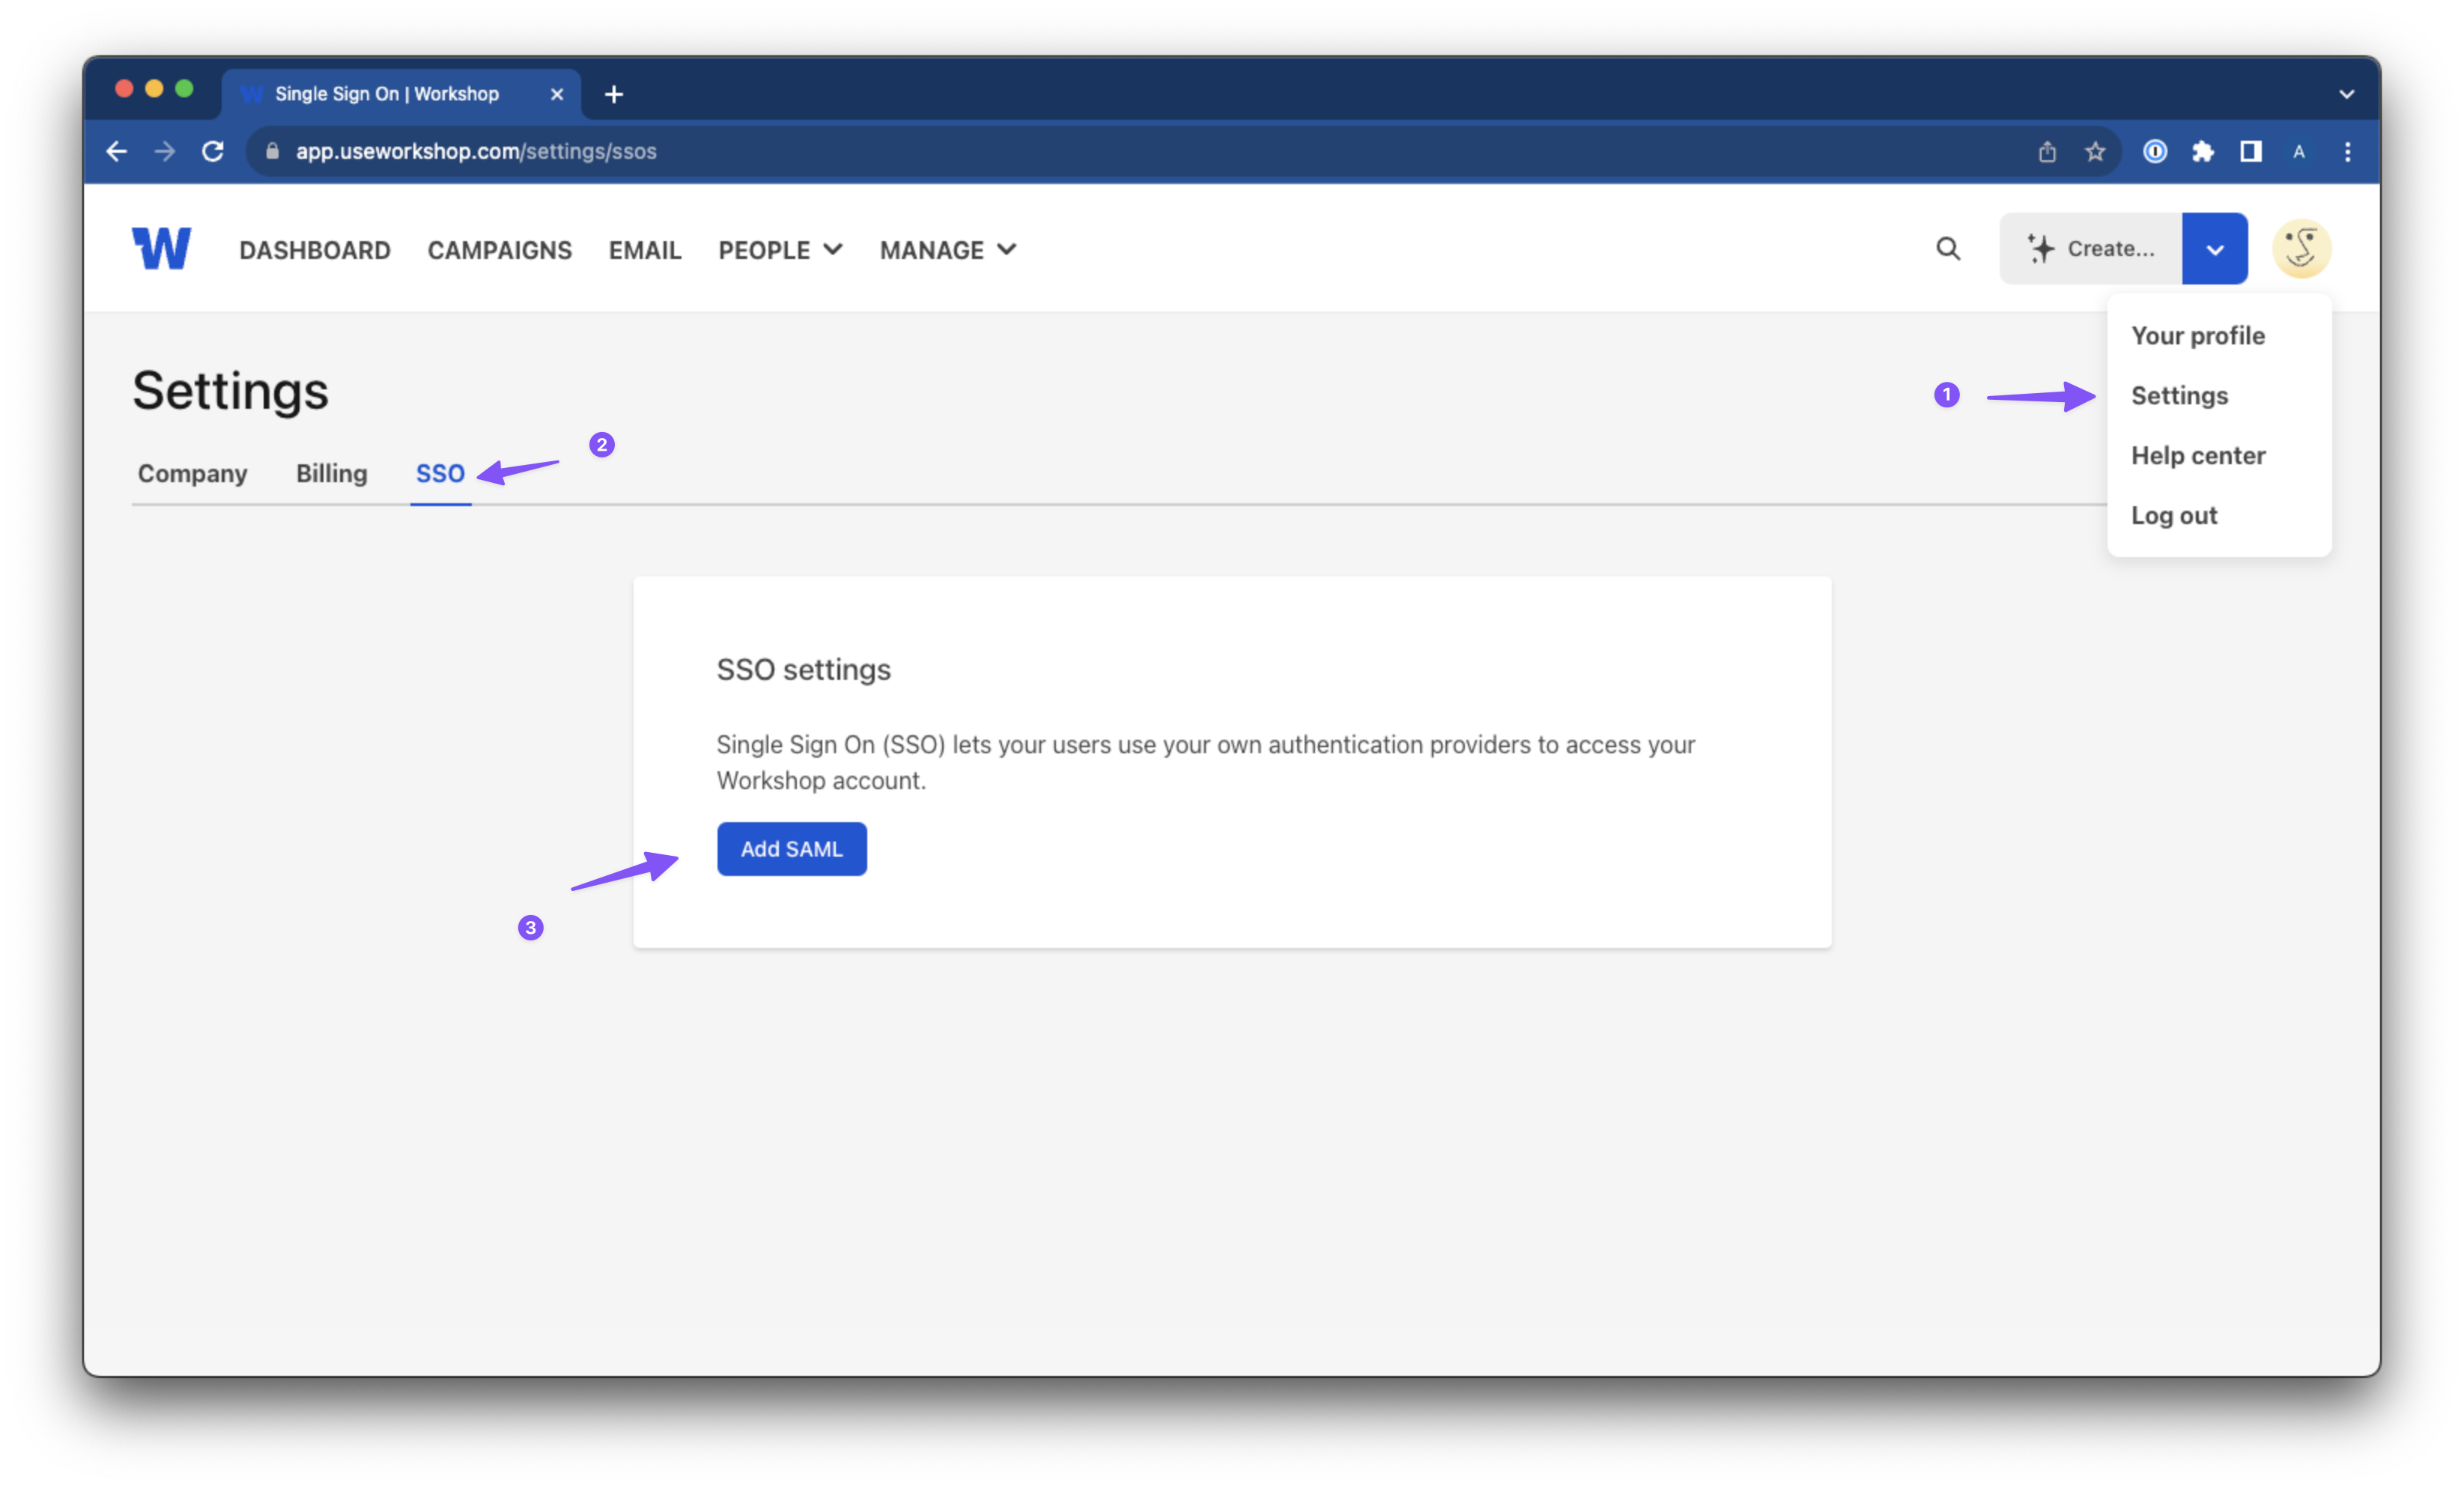
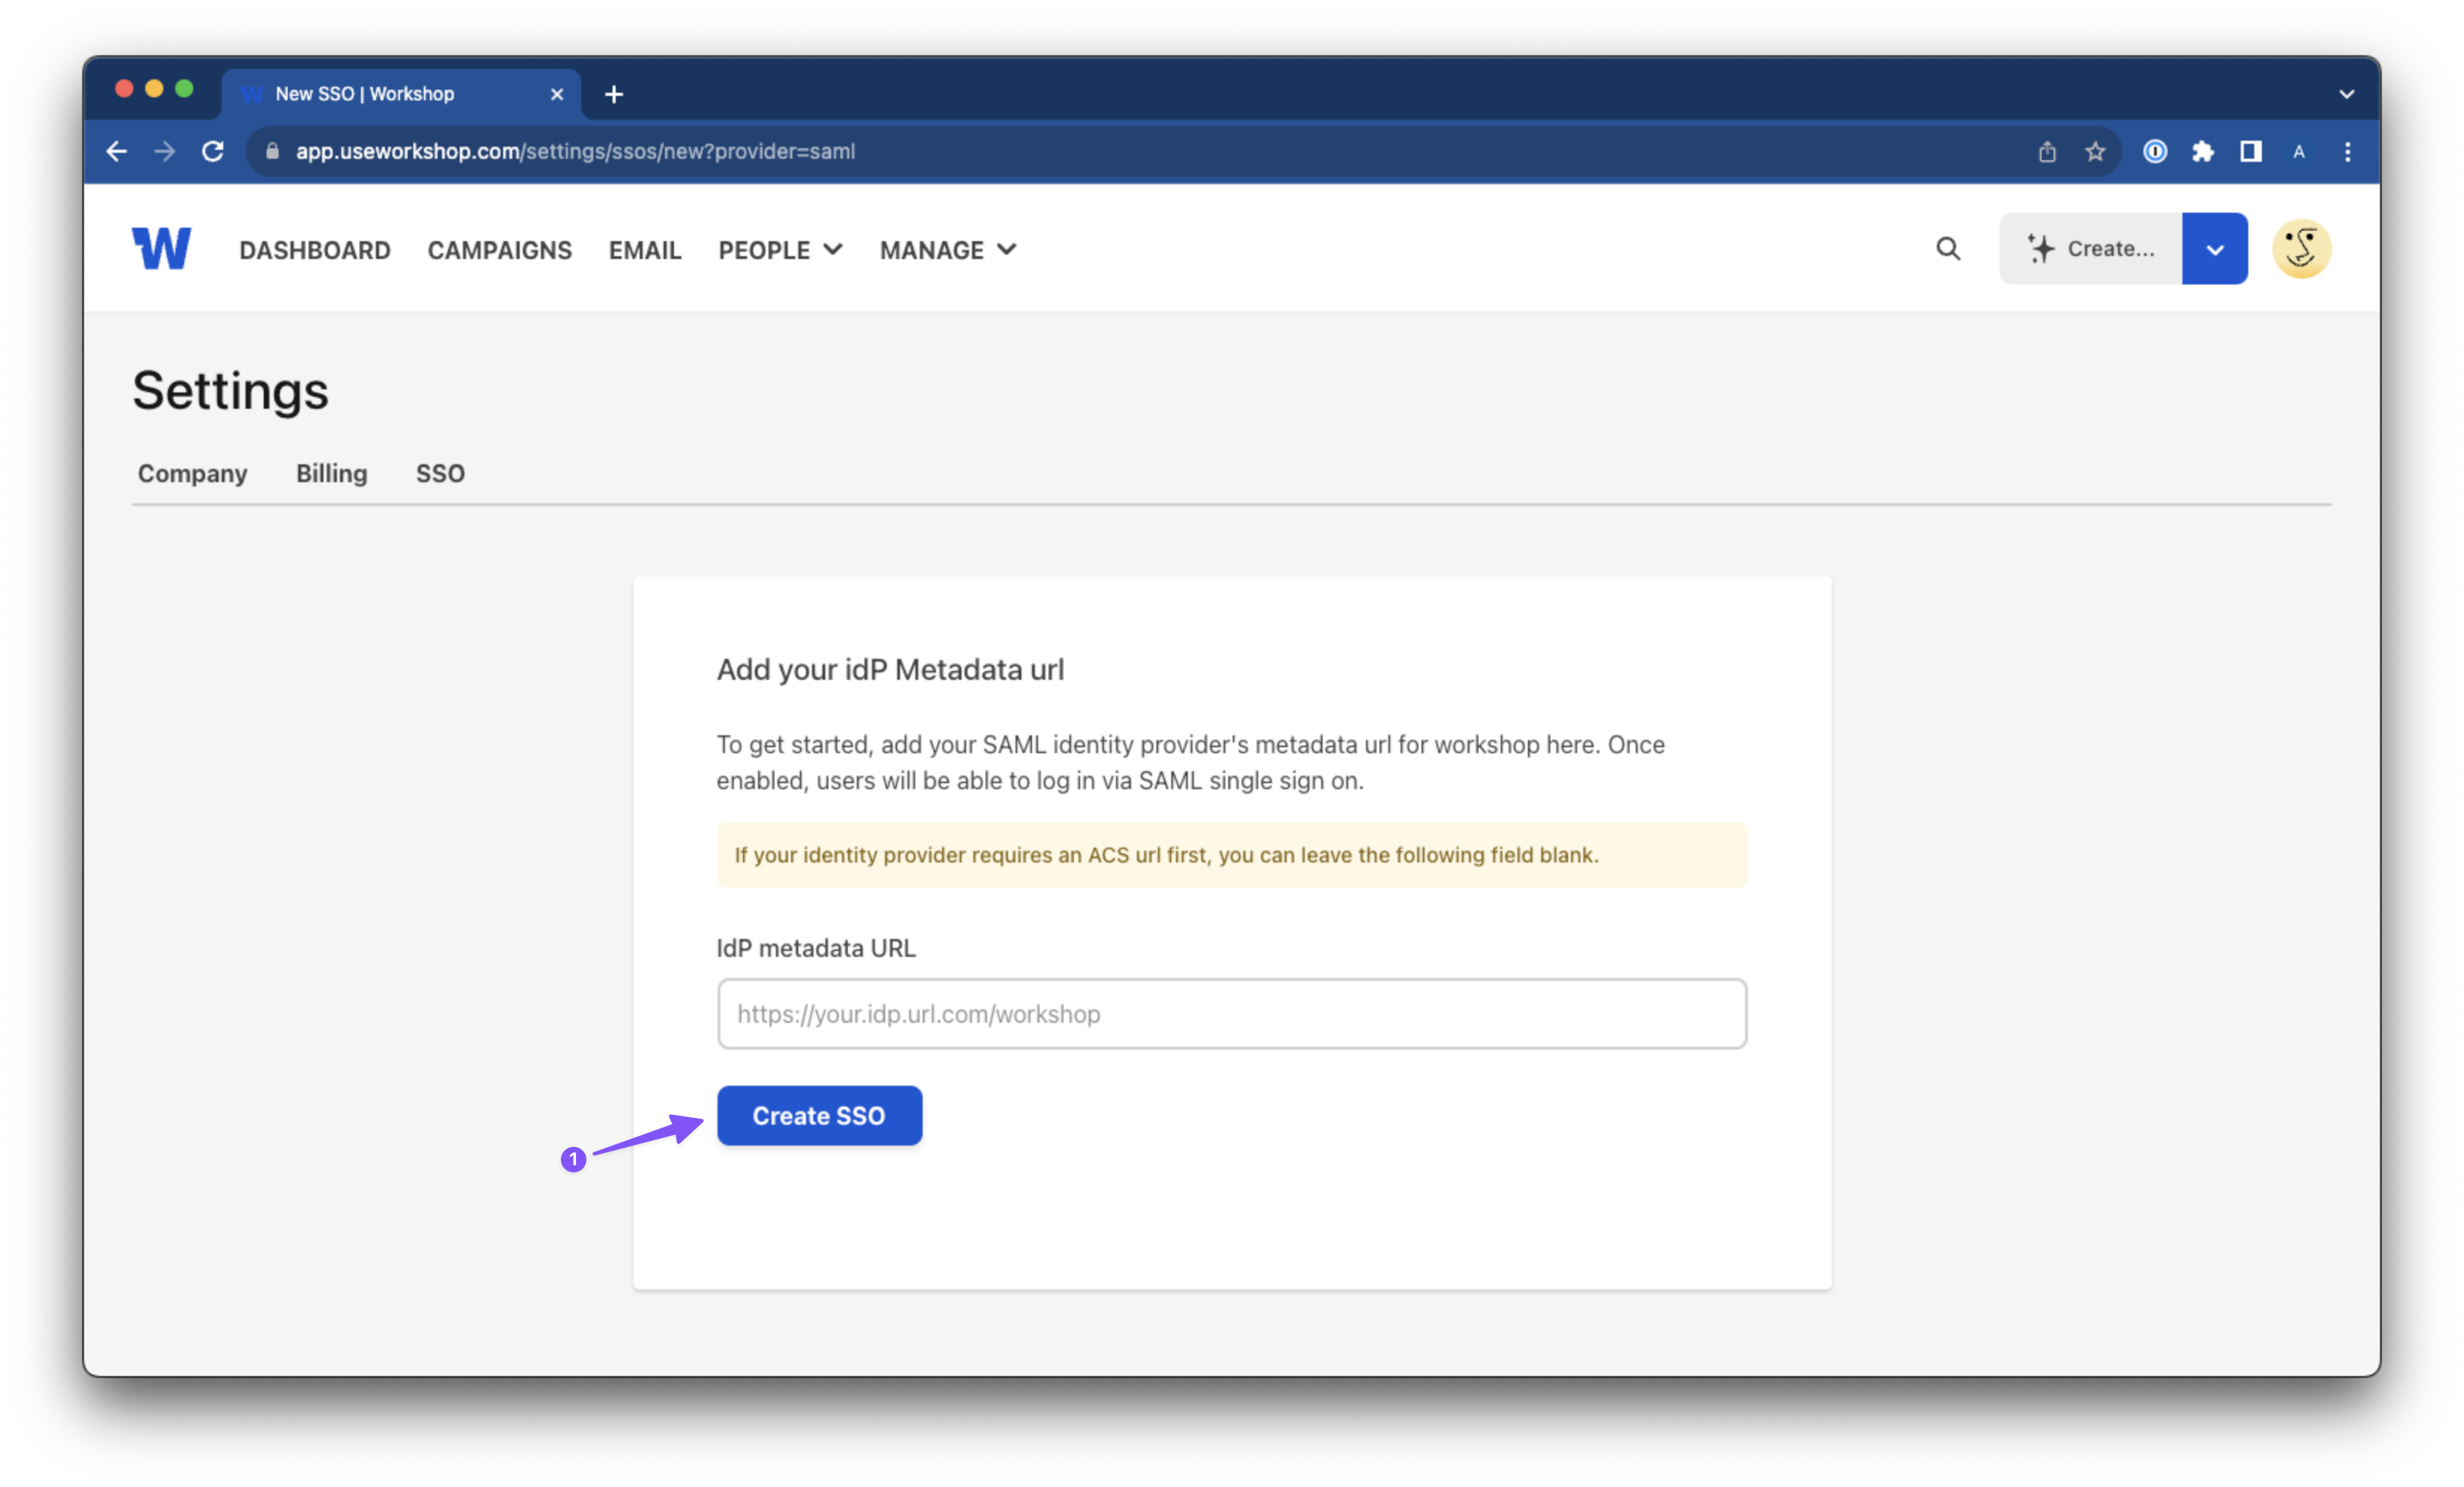
3. Leave the IdP metadata URL empty and select "Create SSO" (Keep this page open for later use)
 Generate Google SAML app
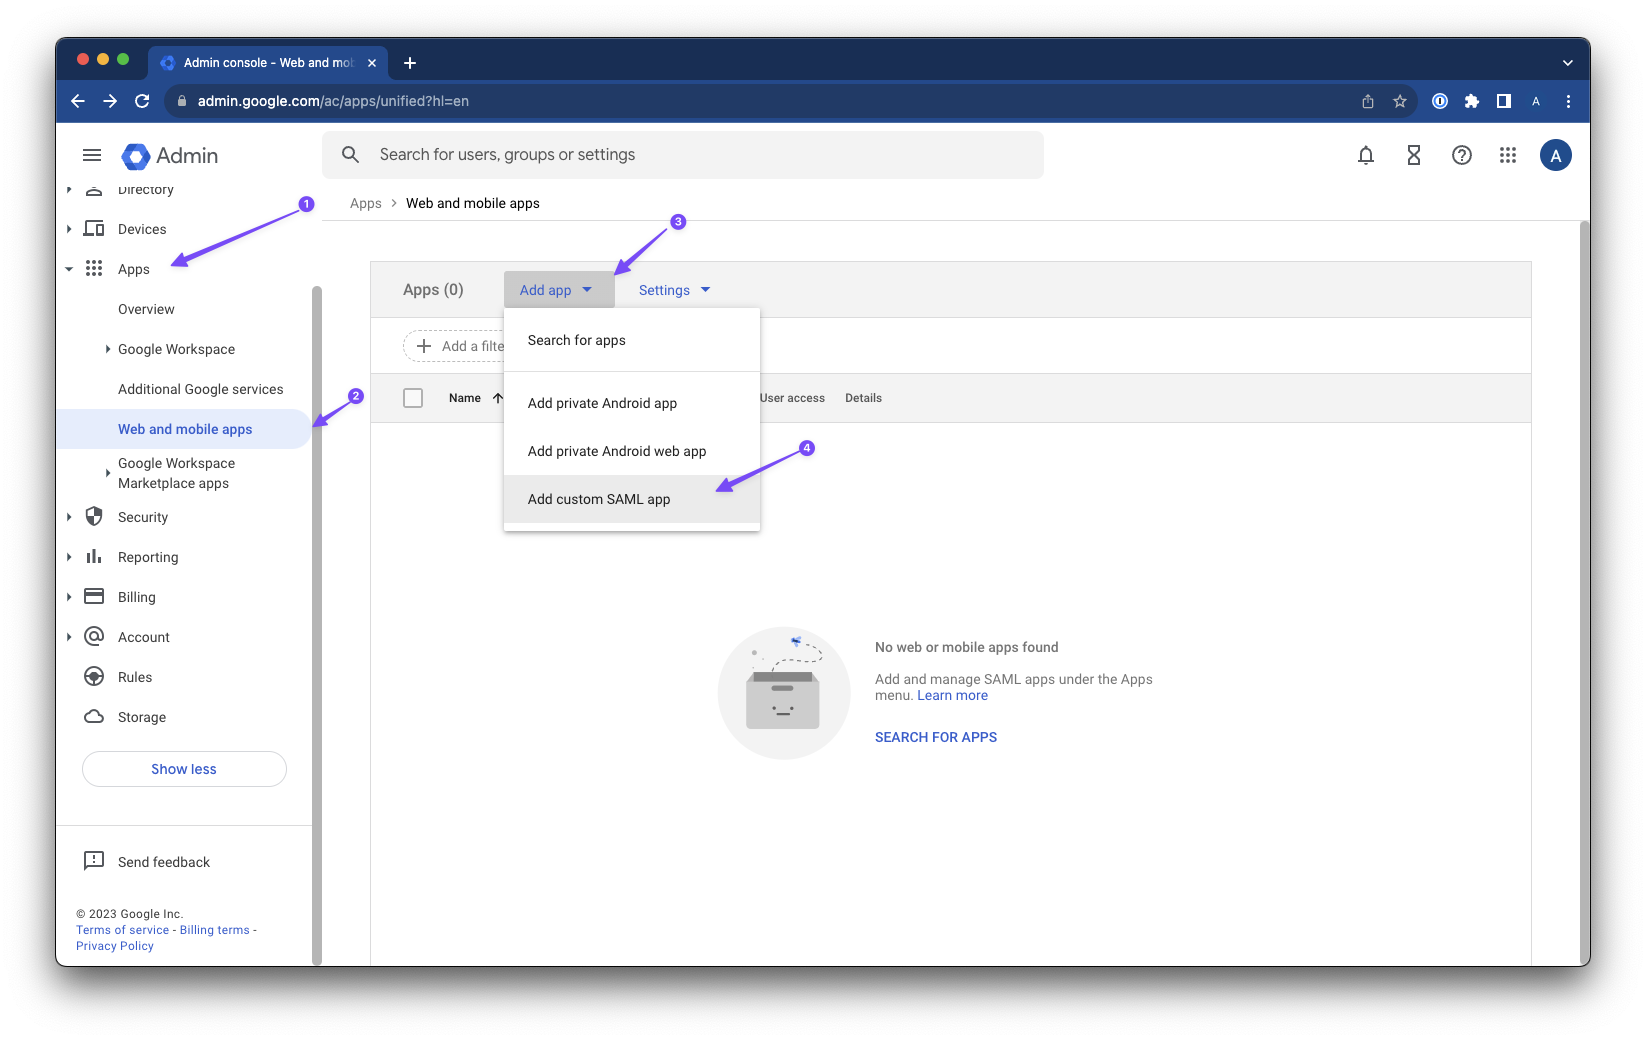
1. Navigate to Google Admin from there go to Apps > Web & Mobile Apps
2. Select "Add app" > "Add custom SAML app"
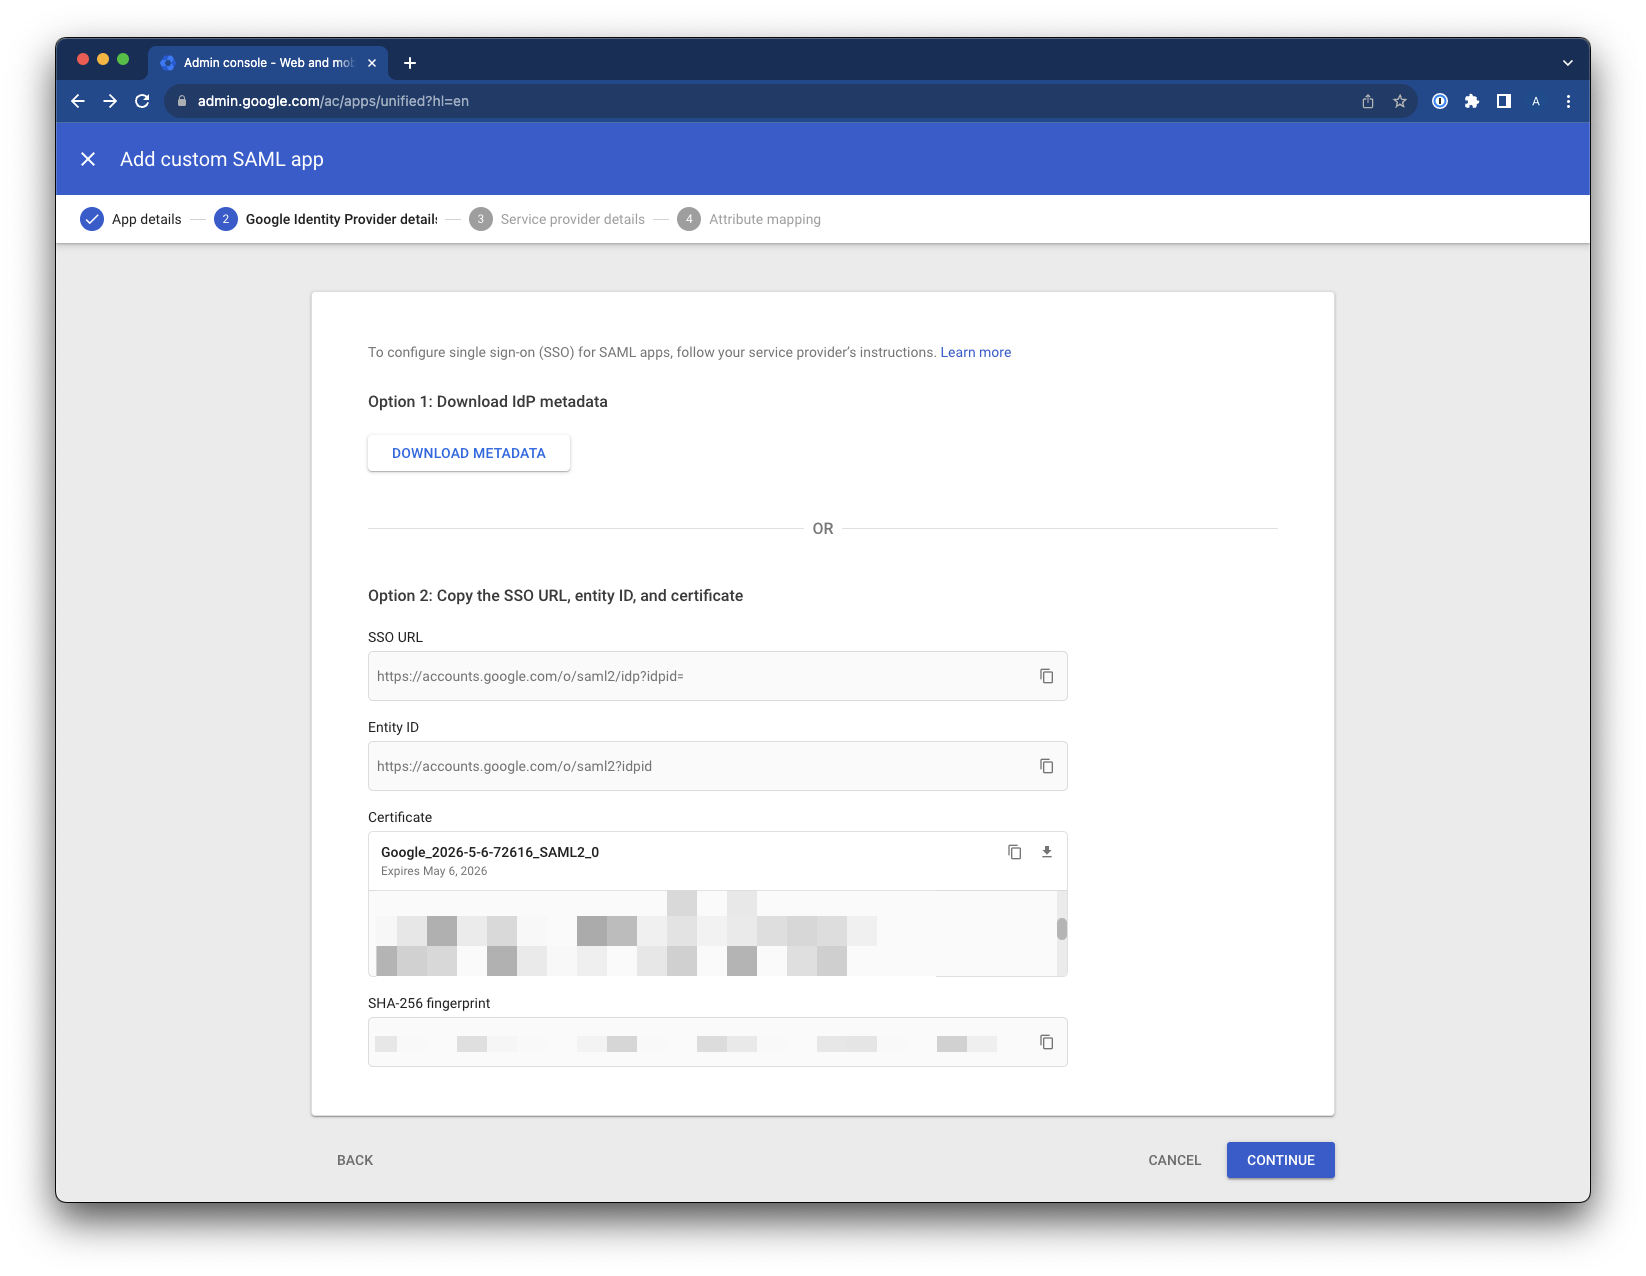
3. Fill in details for app, select "Continue"
4. Continue past page 2
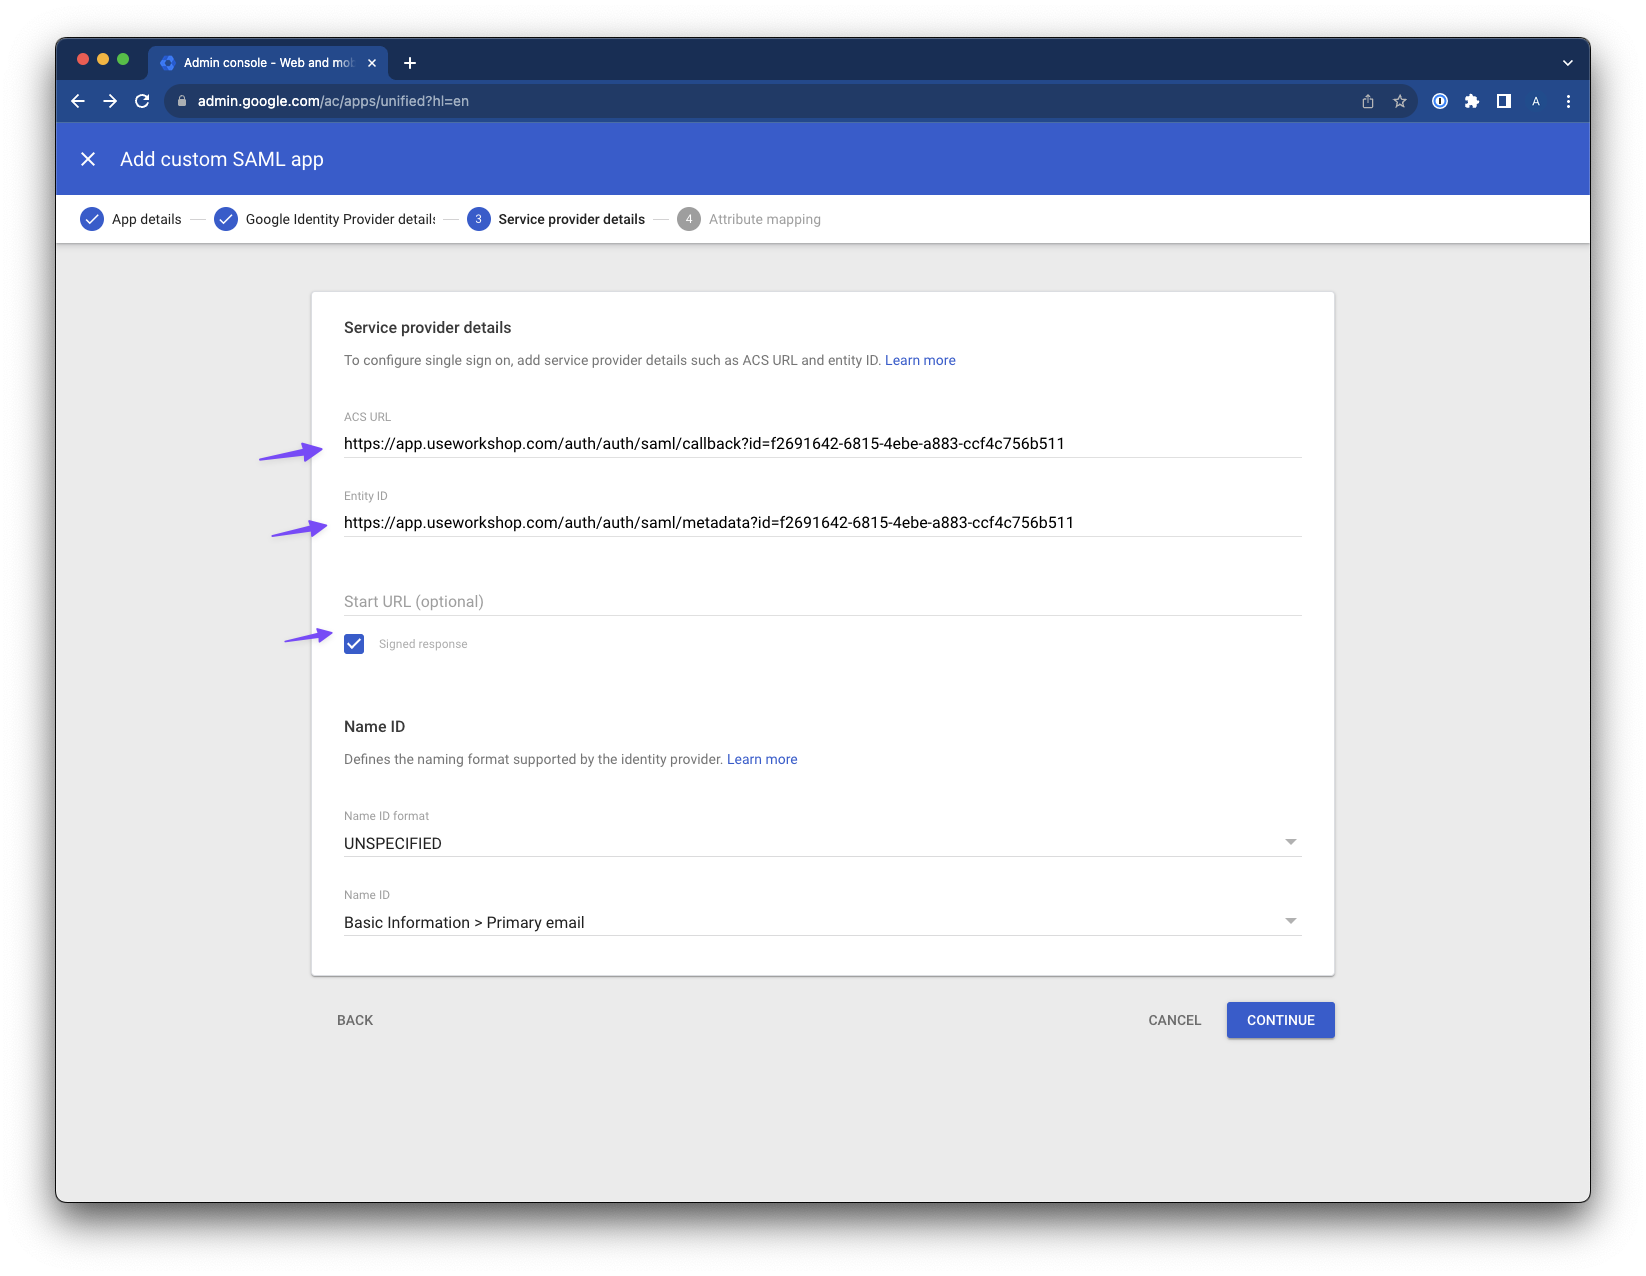
5. On page 3, fill in ACS URL with the with the ACS URL given in the Workshop SSO page
6. Also on page 3, Fill Entity ID with the Entity ID given in the Workshop SSO page
7. Last on page 3, Select the Signed response Checkbox, select "Continue"
8. On page 4, Add 3 mappings:
First name → first_name
Last name → last_name
Primary email → email
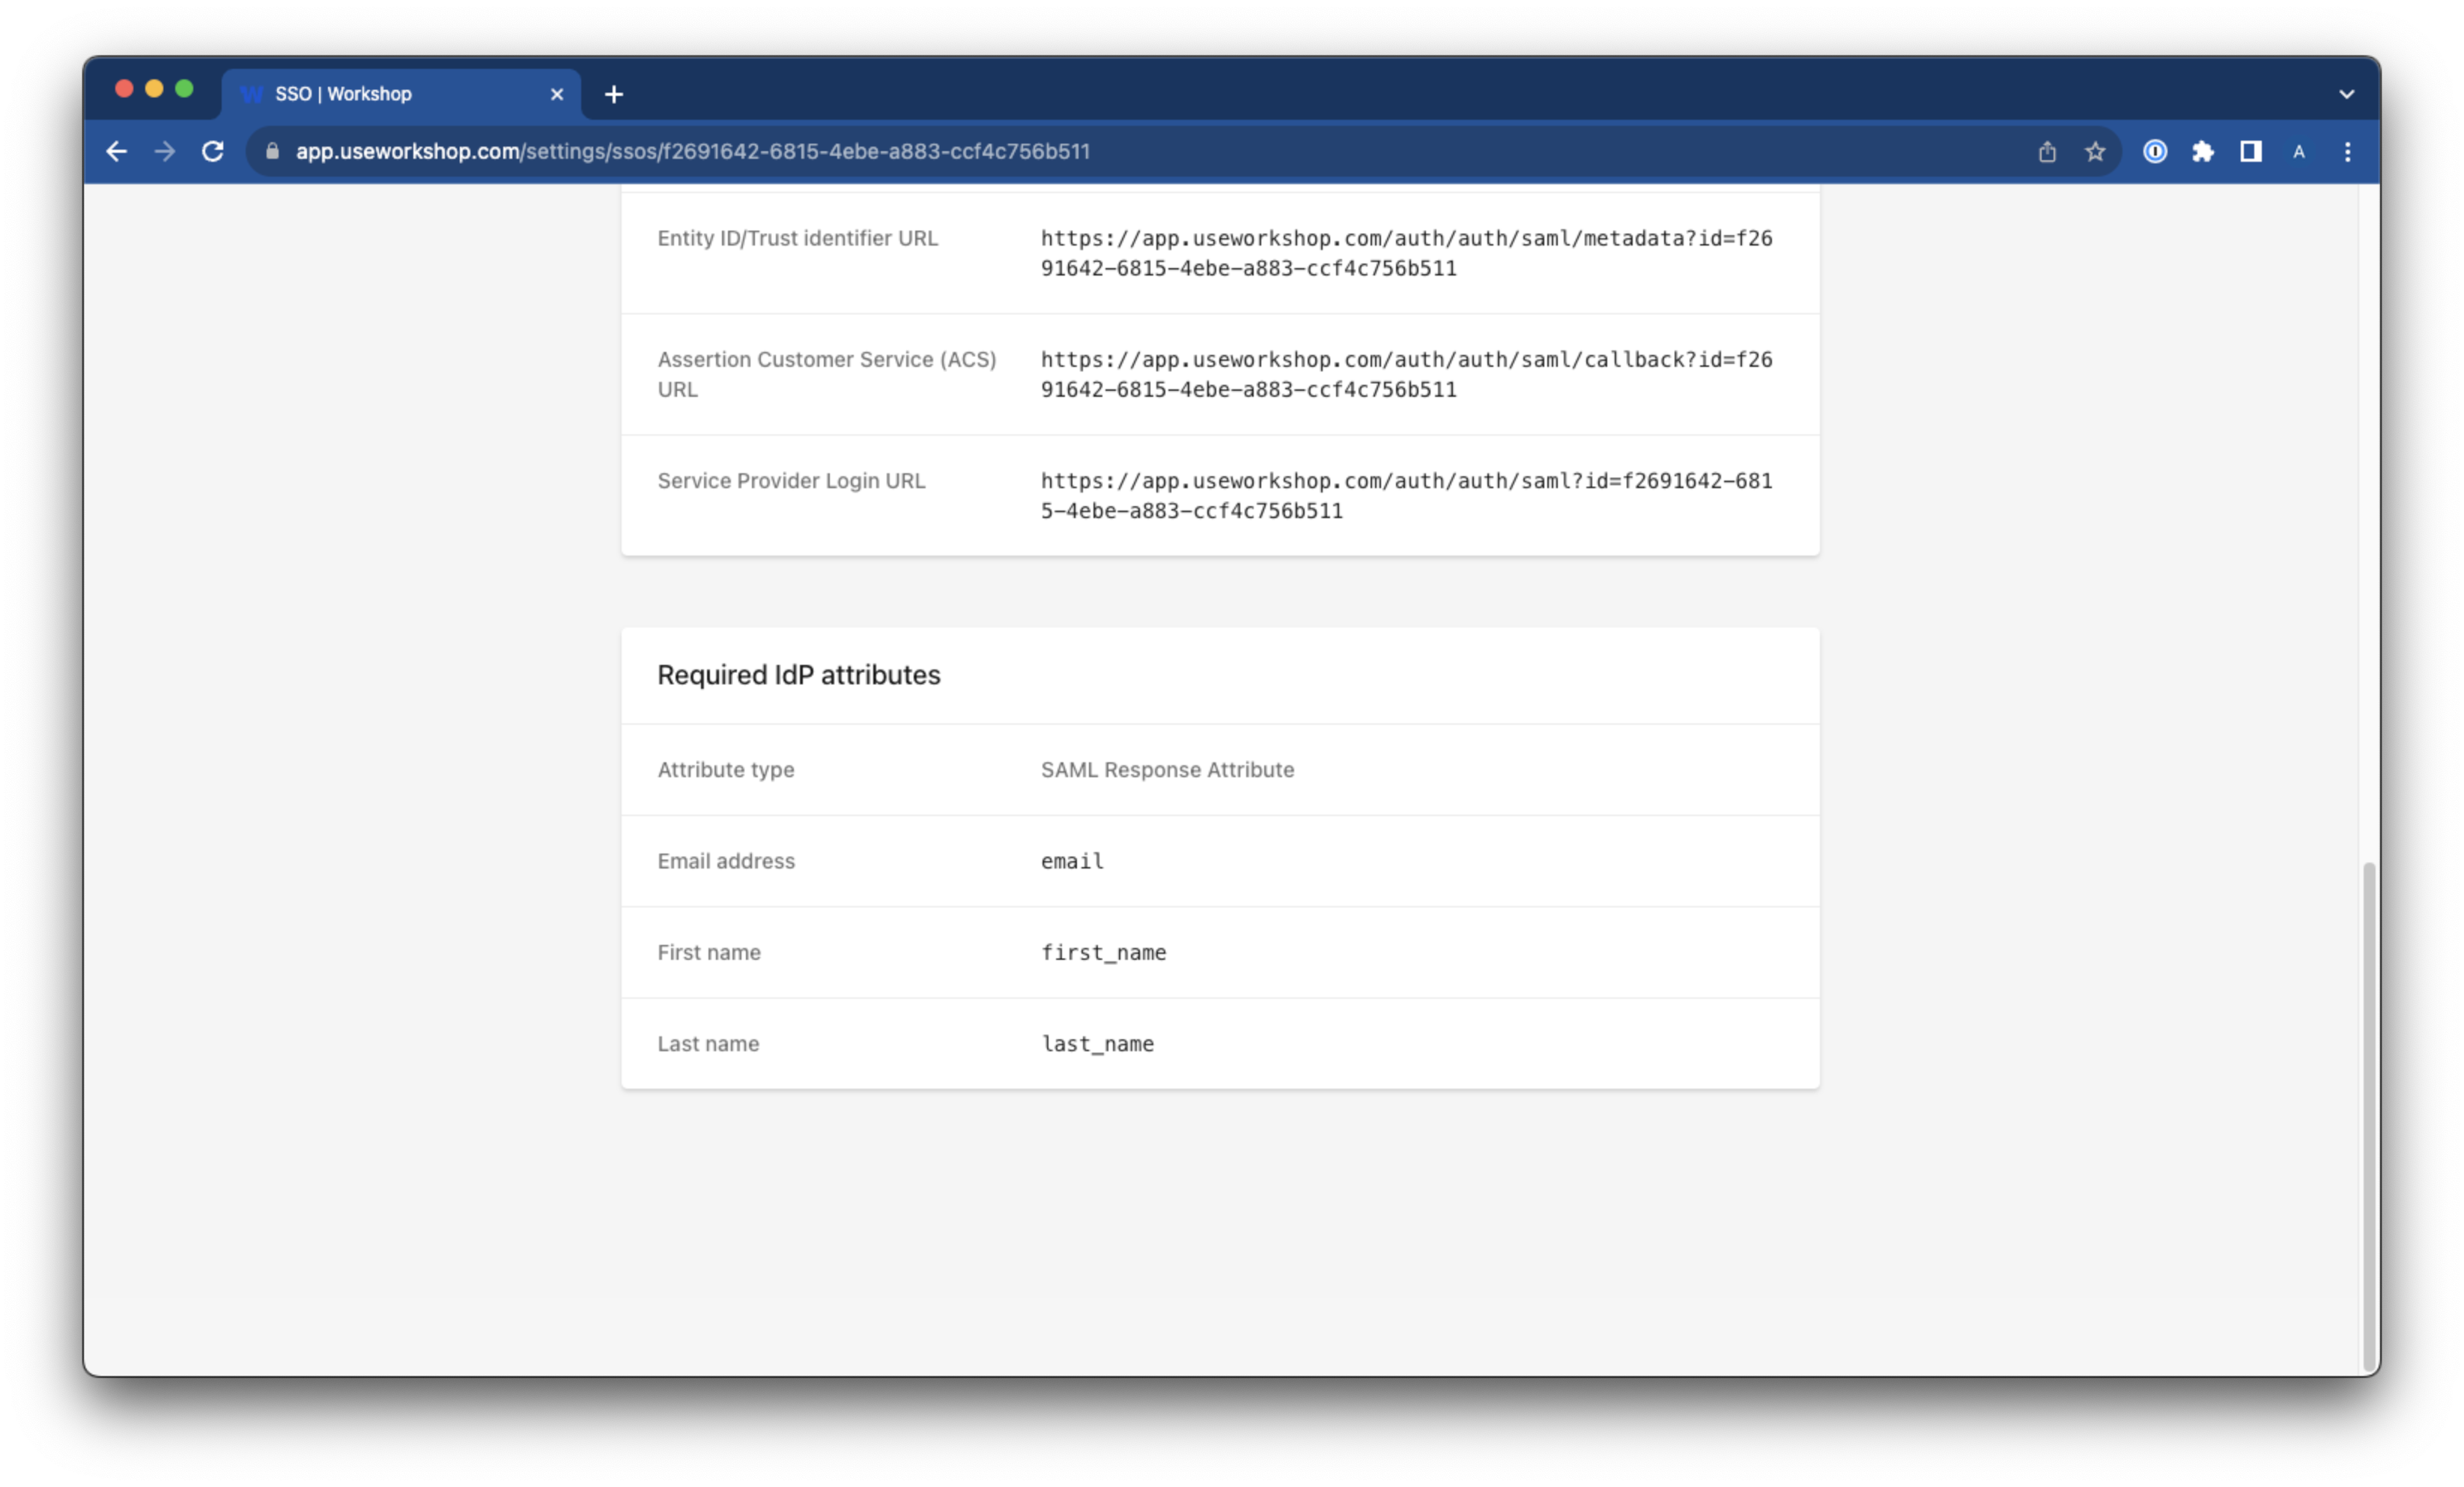
These should match the Required IdP attributes from the Workshop SSO page
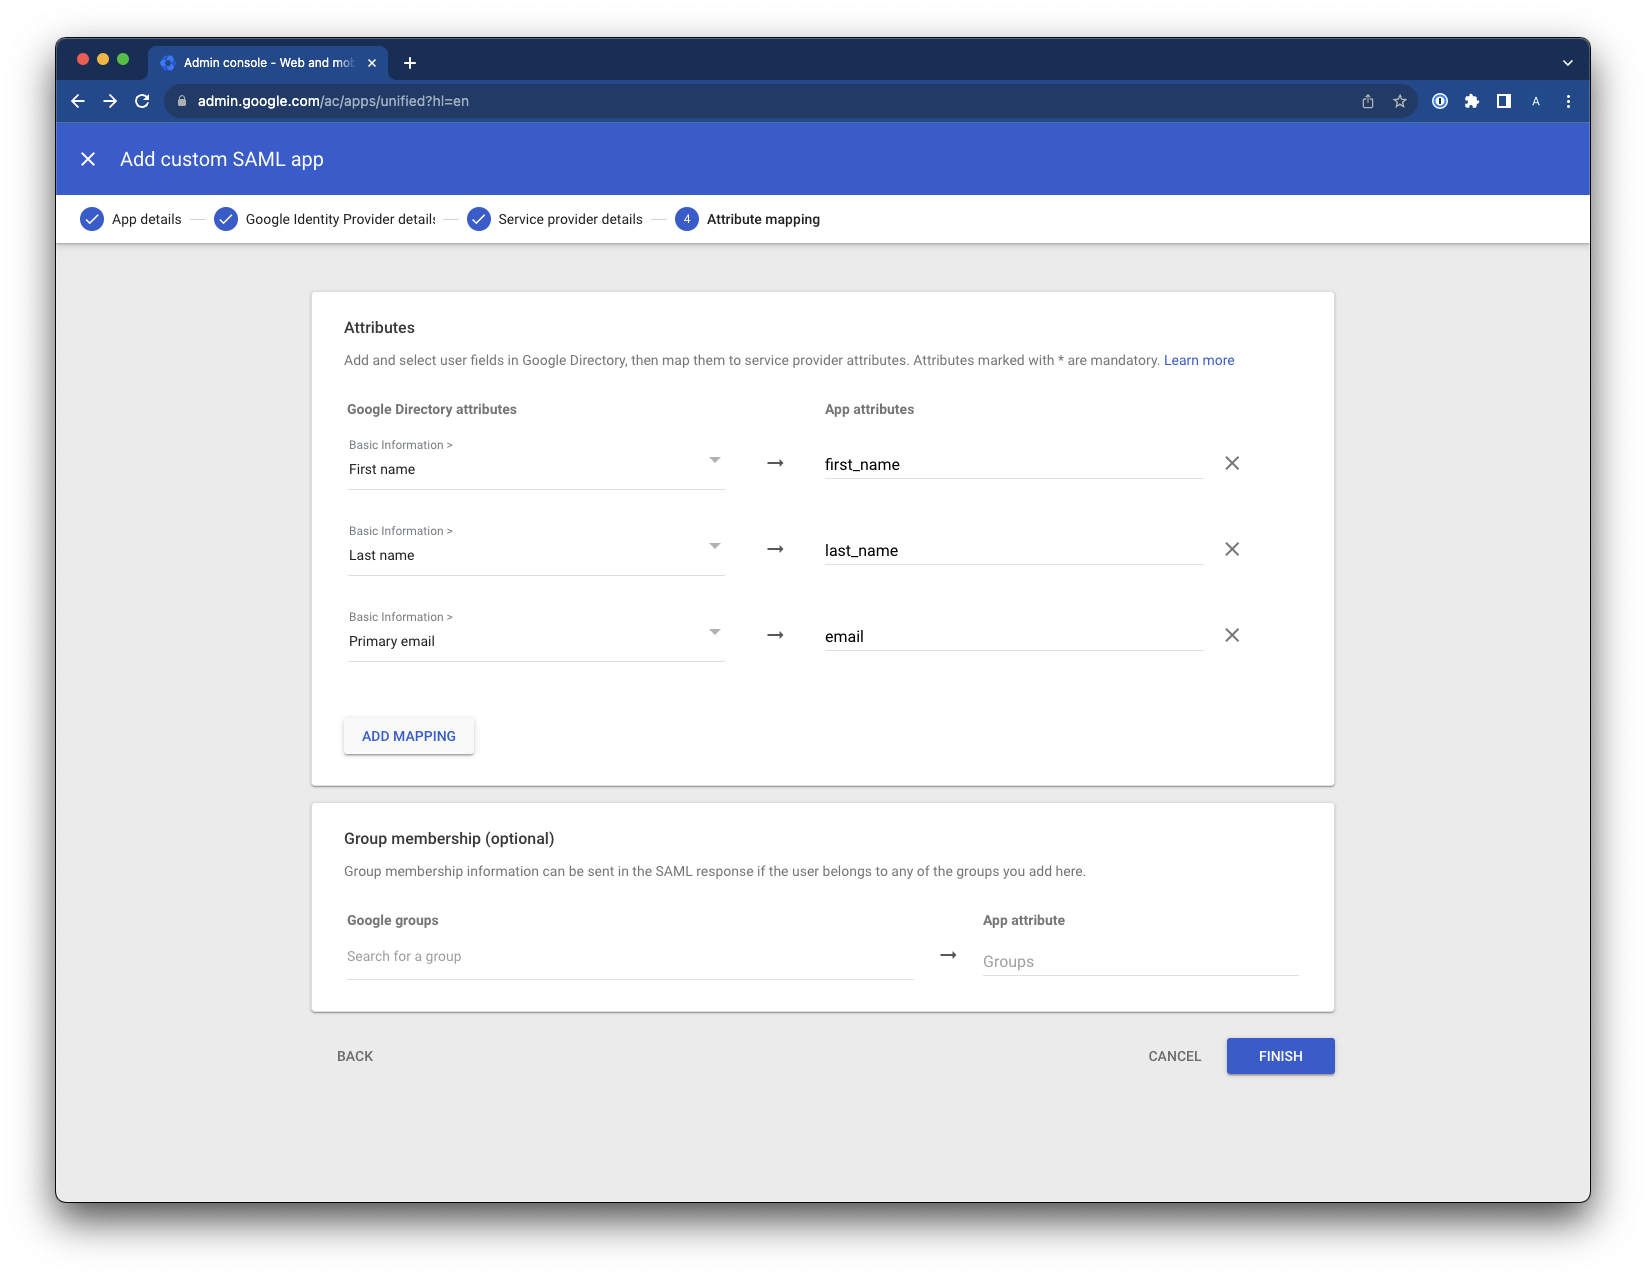
On this page, do not add a group membership
9. Select "Finish" create the app
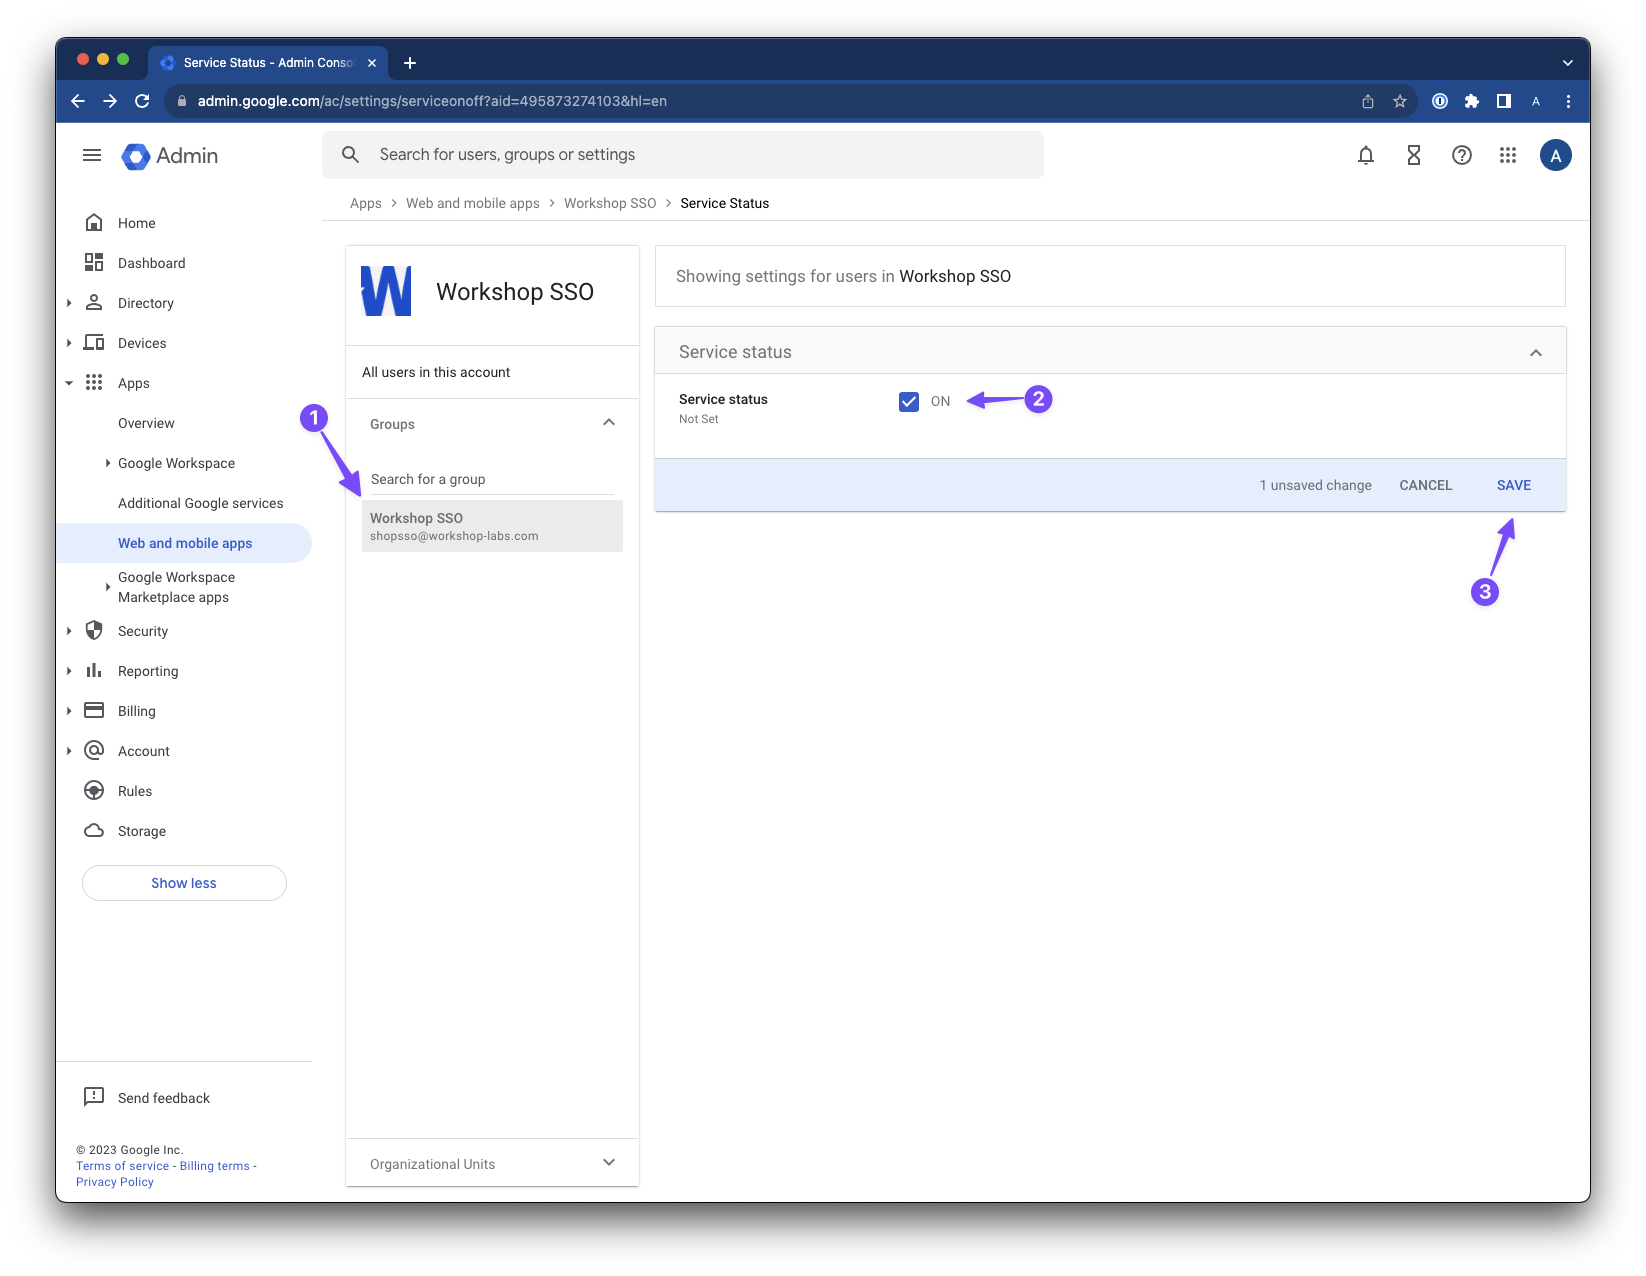
10. Assign a group to the app and Set Service Status to "ON" and select "SAVE"
Once everything is setup completely every member of this group will be able to login to Workshop after being invited.
11. Go back into the app that you created in Admin center and select "DOWNLOAD METADATA" and download the .XML file
-png.png)
12. Send the .XML file to your Workshop Account Manager or to the Onboarding Staff so that we can complete the setup. Once we have completed the setup on our end, you will see the details of the app have been populated within Workshop.
13. Perform your test login!
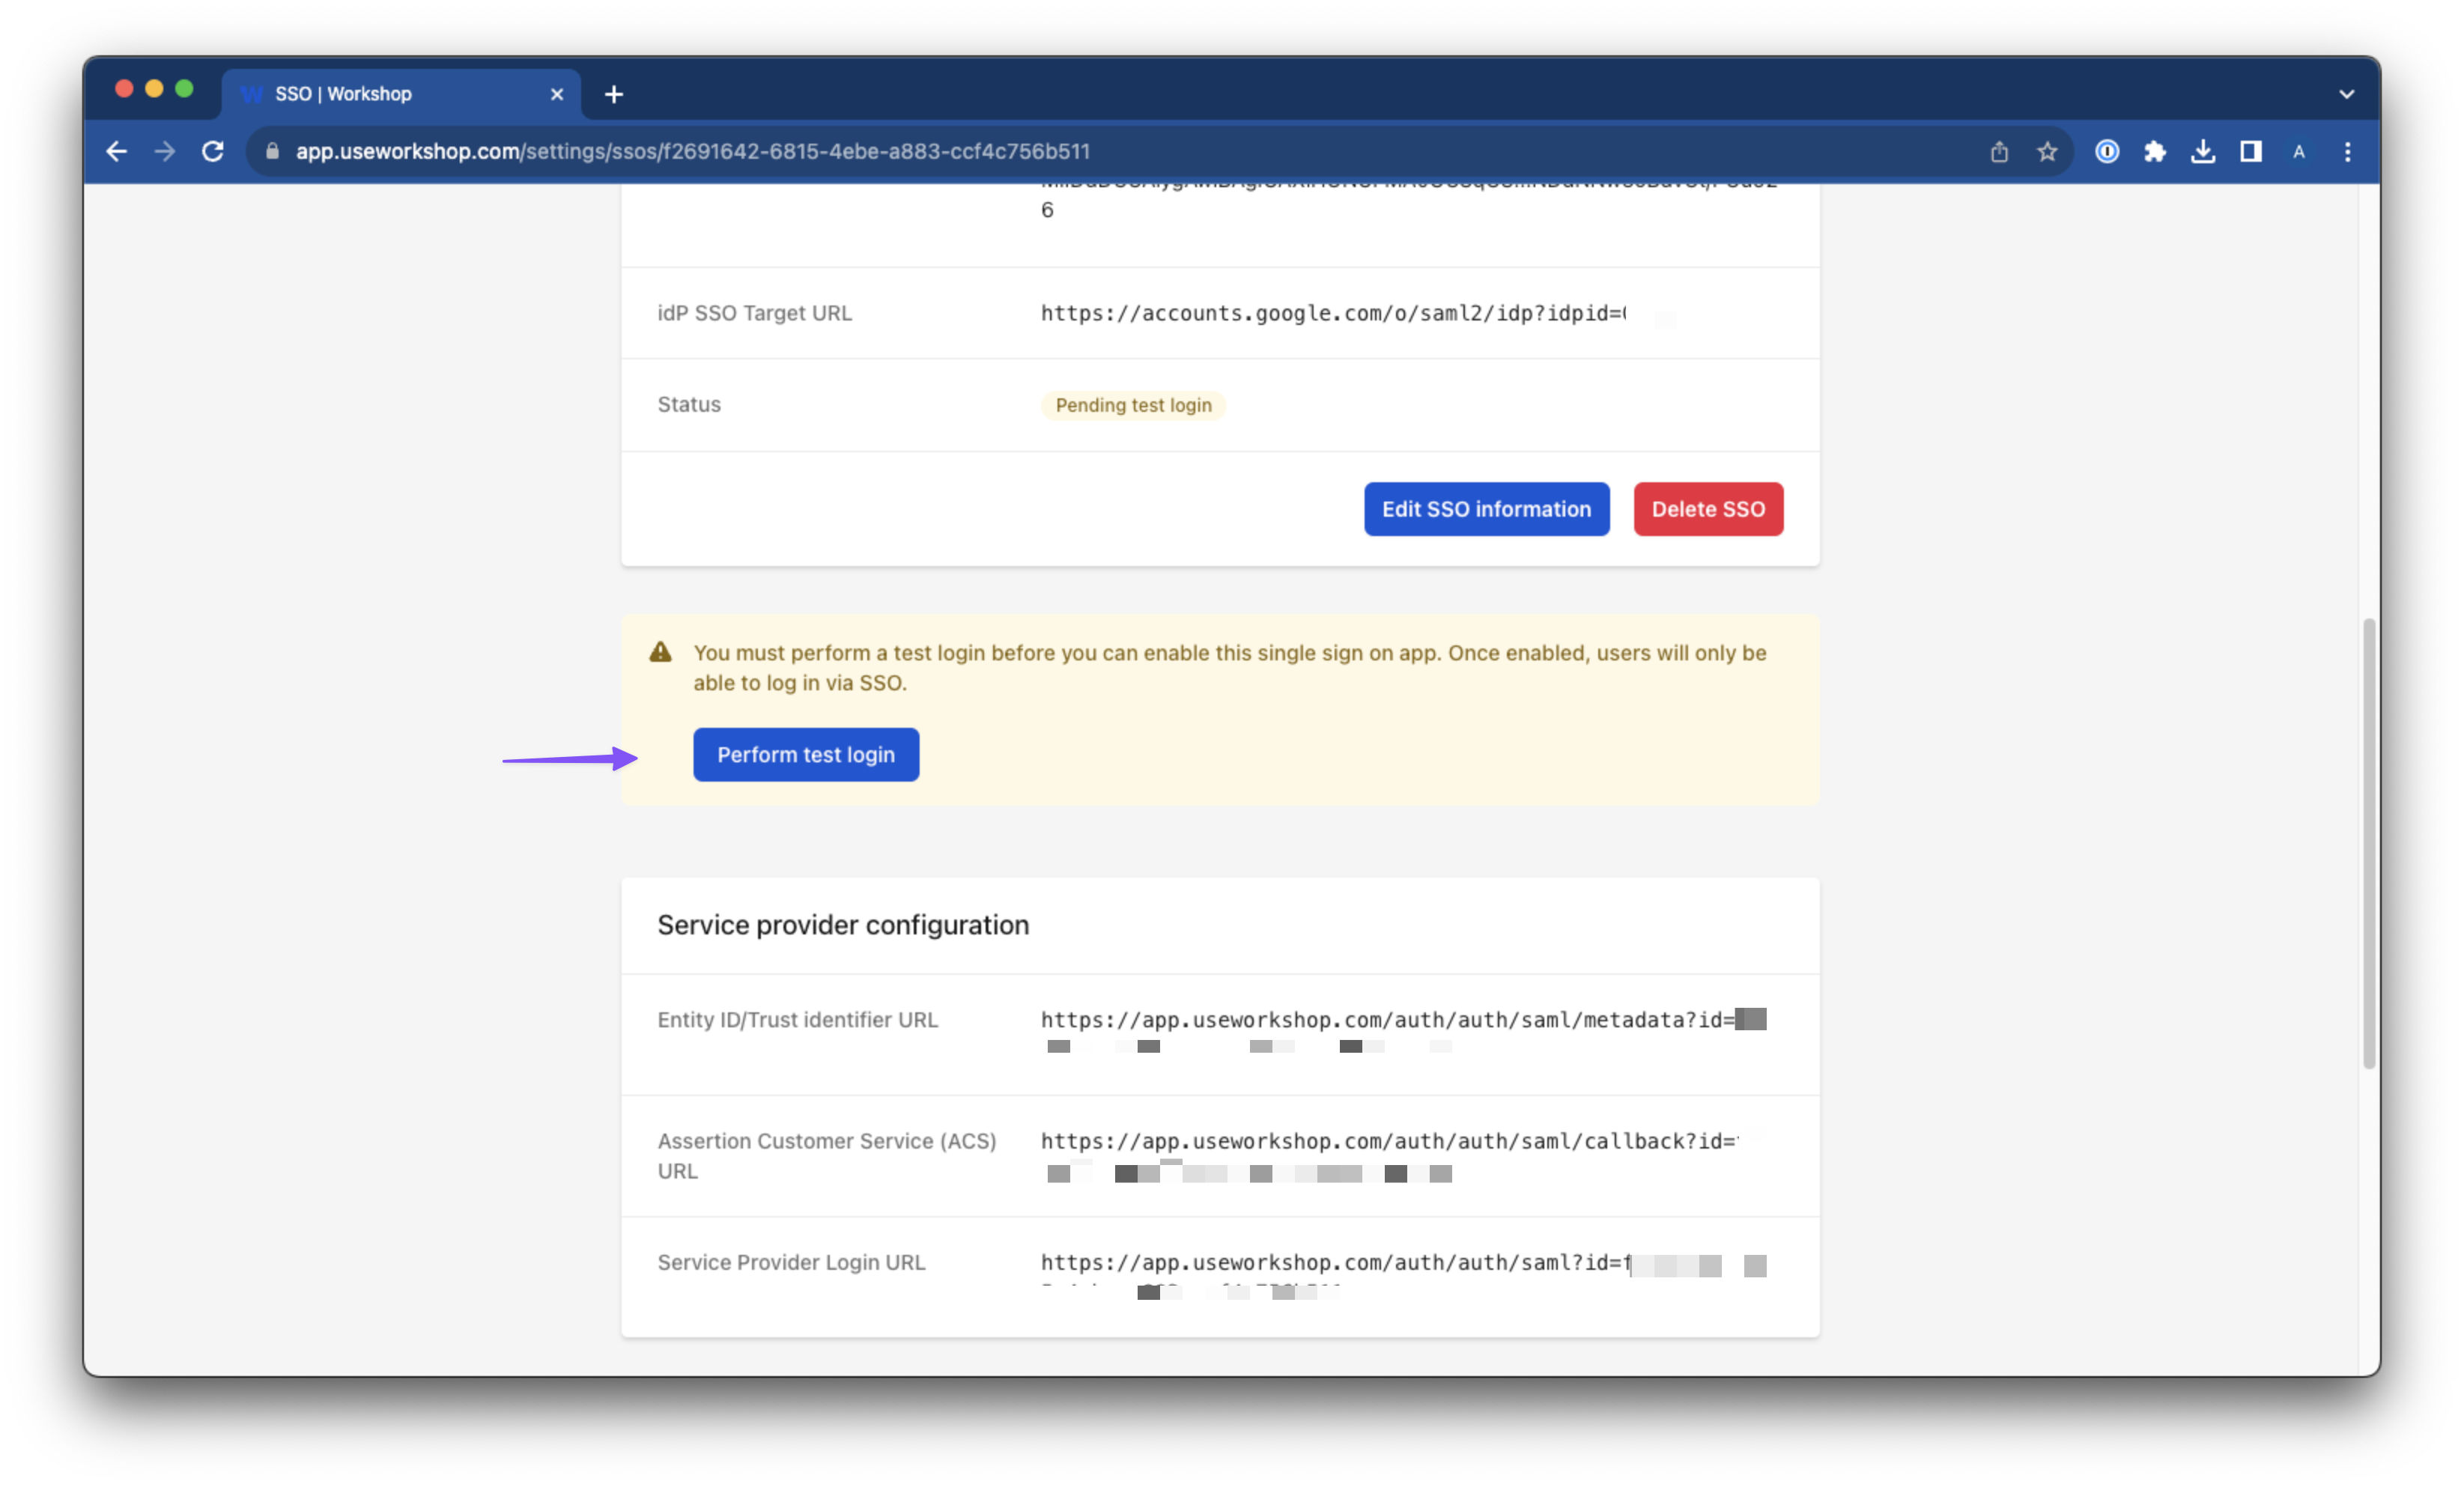
Now Workshop is setup with Google SSO, and your invited users will be able to access Workshop using SSO.